INSTALLATION · MOUNTS · CABLES · GERMAN LEGAL EXAMPLES
How to mount Starlink: roof, wall, pole and balcony
Starlink availability: interactive world map
Select a country on the map or search for its name. Check local availability and offers directly with Starlink.
The interactive map is loaded. Without JavaScript, you’ll find all countries further down the “All countries by status” list.
USUnited States
Available
Starlink started here. Which tariffs, which hardware price and which actions apply to your address, shows the address checker on the Starlink card.
- Address verification free of charge and done in one minute
- Tariffs, hardware price and actions immediately visible
- No account needed to check availability
+1 month freewhen ordering via our referral link – according to Starlink in most places
Check availability at my addressStarlink prices in Germany
Status according to Starlink card data, as of 15.10.2026. The address verification at Starlink is binding.
Data base: public map data from Starlink, read out on 15.10.2026. Map basis: Natural Earth (general), German border representation, simplified. Small island states are presented as points.
Choose your market: current Starlink plans
Checked on 15 October 2026. Residential 100 Mbps and 200 Mbps are available only in selected areas and have download speed caps. Max uses the maximum available speeds; no speed is guaranteed. Roam data allowances, taxes, equipment, shipping and promotions depend on the country and service address. Prices below are monthly advertised service prices, not a binding quote.
| Country or territory | Residential 100 / 200 / Max | Roam |
|---|---|---|
| United States · USD | 55 / 85 / 130 USD / month | 100GB: 55 USD · 300GB: 80 USD · Unlimited: 175 USD |
| United Kingdom · GBP | 40 / 60 / 80 GBP / month | 100GB: 55 GBP · Unlimited: 100 GBP |
| Canada · CAD | 75 / 115 / 150 CAD / month | 100GB: 75 CAD · 300GB: 110 CAD · Unlimited: 200 CAD |
| Australia · AUD | 75 / 110 / 150 AUD / month | 100GB: 85 AUD · Unlimited: 210 AUD |
Some links are referral or affiliate links. Eligible orders may earn us a credit or commission. Referral benefits depend on the applicable Starlink conditions.
A permanent mount is not always necessary for the first setup: depending on the kit, a supplied stand can be used, and the Mini includes a pipe adapter for 31–50 mm poles. If the ground-level view is obstructed, an elevated roof, wall or pole installation may work better. This guide compares mounting locations and compatible brackets, explains the cable route into the building, and includes a cable planner, checklist and our Mini X test photos. The tenancy, building and lightning-protection discussions describe Germany; check the requirements at your own installation site before using them elsewhere.
No Starlink yet? According to Starlink, you will receive a free service month on eligible tariffs via the referral link. You can order the official brackets in the Starlink shop as soon as your kit is ready for shipment.
Popular for the mast

- For Standard 4, Standard 4 X and Enterprise according to the manufacturer – not for mini and performance
- Masts from 31 to 51 mm – for example, an existing satellite mast
- Aluminum with corrosion protection, shade like the original
- Six clamping screws against twisting in the wind
- Direct assembly without wedge adapter according to the manufacturer

Affiliate Note: The Amazon links on this page are affiliate links. If you buy through it, you support our work – as an Amazon partner, we earn from qualified sales without changing the price for you.
The most important thing in 20 seconds
First scan, then drill
The assembly site shall decide on misfires. Check it beforehand with the camera scan of the Starlink app – especially the sky in the north.
Brackets are kit-specific
Mini-mounts do not fit the standard and vice versa. Standard 4, Standard 4 X and Enterprise share the same accessories.
Cables do not cut
Starlink advises against changing or extending the cable – this can jeopardize the warranty. Longer original cables are available in the shop.
Clarify legal matters beforehand
Drilling on facade or balcony needs as a tenant the consent of the landlord, in the community of owners usually a decision.
Briefly answered: Do I need a bracket for Starlink?
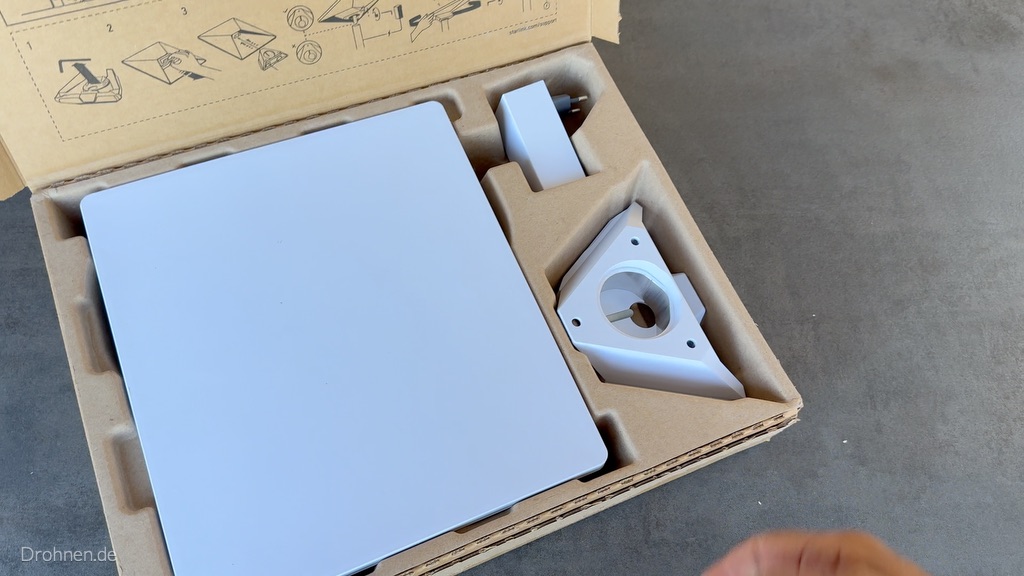
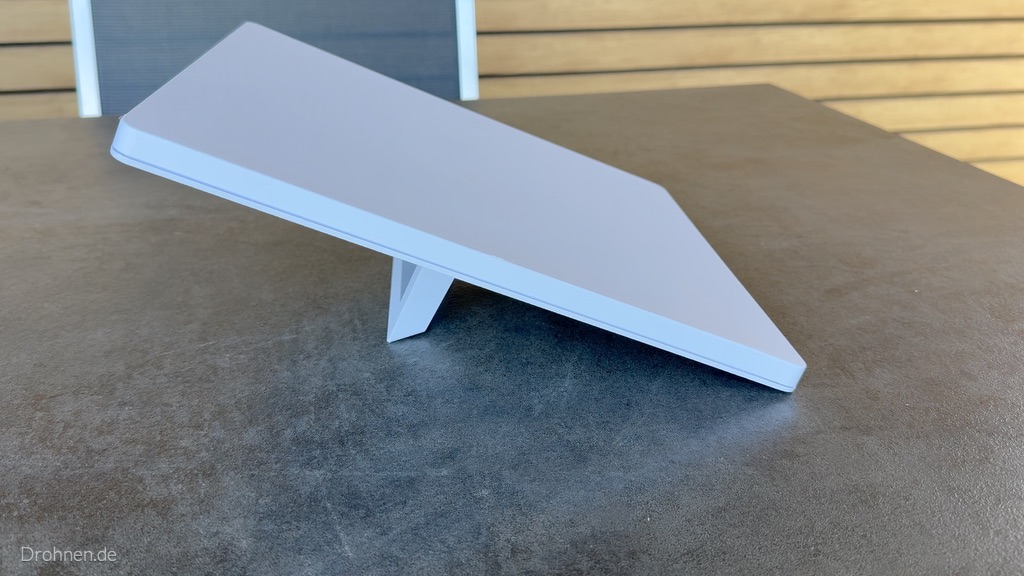
Not mandatory. According to Starlink, standard and mini kits come with everything you need to go online – including a removable stand that is suitable for quick setup or even permanent setup. The Starlink Mini also includes a pipe adapter and a flat bracket, with which you attach the terminal to an existing mast with a diameter of 31 to 50 millimeters.
A separate bracket is worthwhile as soon as obstacles cover the sky on the ground. Starlink writes that many customers have achieved the best result with a fixed holder at an elevated location. Which mount comes into question depends on two things: your kit and the assembly location.
| Kit | Scope of delivery | Cable ex works | Typical next step |
|---|---|---|---|
| Starlink Mini / Mini X | Folding stand, mini-raw adapter and flat support (mast 31-50 mm) | 15 m DC cable | Clamping on existing mast or buying wall mount |
| Standard 4 / Standard 4 X | Removable stand | 15 m Starlink cable (PoE) | Wall, swiveling or pipe holders |
| Enterprise | as standard, accessories identical | 50 m Starlink cable | Wall, swiveling or pipe holders |
| Performance (GEN3) | Bracket of choice: wedge, flat, wall or pipe adapter | 25 m cable | Choose a suitable holder when ordering |
| Performance (GEN2) | Wedge holder for 8° inclination | 25 m cable | Flat-mounted, never vertical |
| Standard Actuated | Ground support for quick start | 15 m cable | Increased mounting for obstacles |
Stances are sufficient
Clear visibility on the ground, for example on a terrace without trees in the north: Then the supplied stand is sufficient, also permanently.
Bench makes sense
Hedge, neighboring house or carport hide the sky: With a bracket on gable, roof or mast, the terminal crosses the obstacles.
Never lay flat
If the terminal is flat, rainwater can collect on the surface and disrupt the connection. Always operate inclined in stand or bracket.
The right installation location: first view, then holding
The most important rule is in the Starlink mounting instructions in the first place: the terminal needs clear view of the sky, so that it remains connected to the satellites while they pass by. A branch, a mast or a roof in the way cause interruptions. In Germany, especially the Heaven in the North important – why this is so and how the app leads when turning, explains our guide Directing Starlink correctly.
The order is therefore always the same: check the assembly location with the camera scan of the app, then select the appropriate holder, then drill. Anyone who first buys a bracket and then finds that the eaves or walnut tree is in the way pays double.
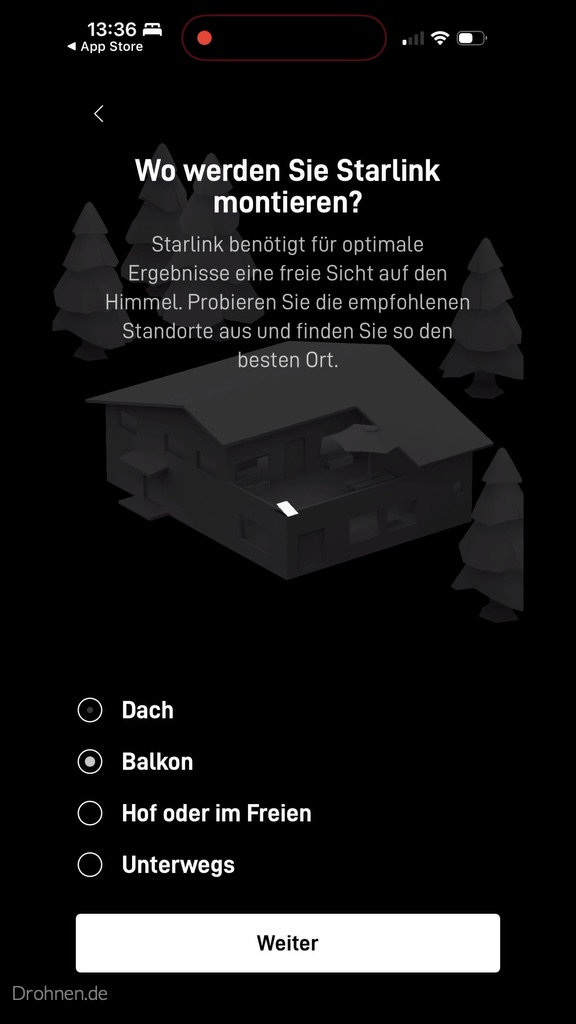
The app queries the assembly location already at the setup – floor, roof, wall, mast or balcony. Subsequently, the obstacle test leads through the sky via smartphone camera and marks roof edges, trees and masts. Only with a good evaluation, the fixed assembly at exactly this point is worthwhile.
Think of the season: bare trees in winter carry foliage in summer. Starlink explicitly cites new leaves as a common cause of new obstacle warnings.
| Place of assembly | Official holding | Drilling? | What matters |
|---|---|---|---|
| Gable or house wall | Wall mount (standard, mini, performance) | Yes, into the wall | Mount close to the gable tip; roof overhang not more than 10,16 cm |
| Inclined roof with shingles | Pivot mount (standard, mini) | Yes, through the roof skin | Sealing tape; arrow to the tip of the roof |
| Ziegeldach | No own; ridge mount not recommended for clay tiles | depending on the solution | Sat-roof rafter holder plus pipe adapter from the specialist company |
| Roof first without drilling | First mount (Standard, Enterprise) | No, ballast | Roof slope below 45°, wind up to 80 km/h according to Starlink |
| Existing mast | Pipe adapter (standard 31–63,5 mm, Mini in Kit 31–50 mm) | No | only metal masts, not PVC or plastic |
| Garden or soil | Stand; X-frame base (standard) | No | Terminal inclined, cable protected |
| Balcon | Not own | as far as possible not | Prefer north side, clarify permit and fall protection |
| Vehicle, boat, motorhome | Mobility mount, roof rack mount | depending on the holder, | See advice for travel and trucks |
For motorhomes, vans and trucks, our own rules apply, from the tariff to the fixing during the journey – more in our guides Starlink in the motorhome and Starlink in the truck.
Mini or Standard? Which kits are available at your address, Starlink shows after entering the address – the kit determines which brackets fit. As a new customer, there is a service month free of charge via the recommendation link.
Official Starlink brackets: which one fits which kit
Starlink sells its own assembly accessories for each kit. Important is the note from the help center: The brackets are kit-specific and do not fit other terminals. So the mini wall mount does not take up any standard. Accessories for the standard, on the other hand, also fit standard 4 X and Enterprise, because these kits use the same terminal format. You can order the mounts in the Starlink shop as soon as your kit is ready for shipment. Some models are also available in the trade.
| Mounting fixture | Deployment | Important limit values | Delivery scope |
|---|---|---|---|
| wall mount | External wall near the gable or facade tip | Roof overhang max. 10,16 cm (4 inches) | Holder, end cap, mast adapter, mast, silicone, 2 tension screws, 20 cable clips |
| Swivel mount | Pitched roof with shingles | Mast is vertically fixed | Bracket, mast adapter, mast, sealing tape strips and squares, 2 tension screws, 20 cable clips |
| Rohradapter | Existing fattening | 31 to 63.5 mm, only metal – no PVC, no plastic | Adapters, hexagon socket wrenches, 20 cable clips; mast not included |
| First holder | ridge of a saddle roof, without drilling | Roof slope below 45°, wind up to 80 km/h, not recommended for clay tiles | Bracket, 4 ballast weights (together 25.3 kg shipping weight) |
| Mobility bracket | Permanently on wood, GRP, metal, plastic, rails | 8° mounting angle, watertight seal | Stainless steel screws, nuts, sealing washers |
| X-frame base | Ground assembly or quick-mounting | – | Base, mast adapter, mast |
| Roof support | Vehicle roof supports | Carrier 15 to 44.5 mm thick, maximum 95 mm wide, or T-groove | Base, grip pad, 4 M8 screws, tool |
| Adapter for motor brackets | New standard kit on old mount of the motor kit | For short/long wall mounts, pivot mounts, floor and ridge mounts | Tube adapter, mast tube, hexagon socket wrench |
| Mounting fixture | Deployment | Important limit values | Delivery scope |
|---|---|---|---|
| Mini wall mount | External wall near the gable or facade tip | Roof overhang max 10,16 cm | Bracket, silicone, 2 tension screws, 20 cable clips |
| Mini swing mount | Pitched roof with shingles | Pivot mechanism for different angles | Holder, sealing tape, 2 tension screws, 20 cable clips |
| Mini-Mobility holder | Permanently on wood, GRP, metal, plastic | 9° mounting angle, watertight | Screws in three lengths, nuts, sealing disks |
| Mini roof rack holder | Roof rack of car and camper | Supports 12 to 48 mm thick, max. 88 mm wide; not for round supports | Mounting fixture |
| Mini unwrought and flat holder | Replacement or second mounting point | Mast according to help center 31 to 50 mm | Flat-mounted adaptors; screws for flat mounting not included |
Performance kits again have their own accessories: wedge mount with 8° and flat mount with 2° inclination for vehicles and boats – according to Starlink designed for wind up to 280 km/h -, plus a pipe adapter for masts from 38 to 60 millimeters and a wall mount. If you change from the old standard with engine to a current kit, you do not have to dismantle the existing bracket: Starlink offers an adapter that puts the new standard terminal on the old wall, pan, floor and ridge brackets. Which terminal suits you, shows our Starlink hardware comparison.
What do the originals cost? The price comparison was on the 29th. September 2026 the standard wall mount from 84.95 euros, the standard raw wheel adapter from 50.60 euros, the mini wall mount from 39.00 euros and the mini pivot mount from 42.00 euros (idealo). In the hardware store, the standard wall mount cost 97 euros (Hornbach). Prices vary significantly depending on the dealer. Alternatives from third-party providers on Amazon are often cheaper and offer longer arms – whether this is worthwhile and which models we recommend, shows our large Starlink mount comparison.
Original or alternative? In the bracket comparison, we categorize over 20 different Amazon products for mini and standard – with bracket finder for your assembly location.
Step by step: Mount wall mount on the gable
The wall mount is the obvious solution for most houses: it brings the terminal at the gable tip over hedges, carports and neighboring buildings. The following steps summarize the official mounting manual for the standard wall mount; the mini wall mount is mounted on the same principle.
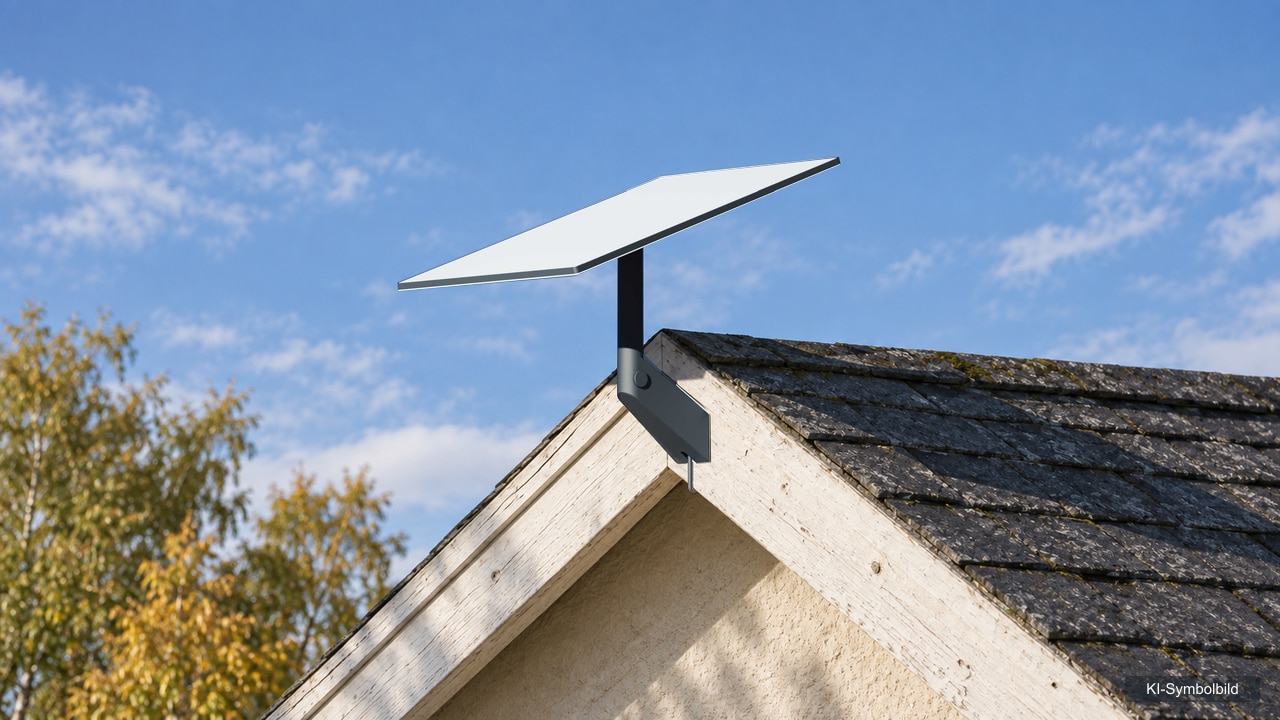
In carton
Wall bracket, end cap, mast adapter, mast, silicone, two tension bolts (3/8 × 3,5 inches) and 20 cable guide clips.
tool according to Starlink
Drilling machine or impact wrench, 6 mm drill, wrench insert 9/16 inch (approximately 14.3 mm), pin and spirit level.
Surely working
Gable tips are often six meters and higher. Work only with a secure ladder or scaffolding and never alone – in case of doubt commission the specialist company.
1
Check location
With the obstacle check of the app, check whether the point on the gable has clear view. Leave enough space for the terminal to rotate when aligning.
2
Remove stands
Press the unlocking tab at the terminal and pull the stand from its fixed position.
3
mark holes
Mark the two mounting holes directly above a load-bearing beam, as specified by Starlink.
4
Pre-drilling
Pre-drill both holes with the 6 mm drill.
5
Sealing and screwing
Apply silicone inside and over the holes, then secure the bracket with the two specified fasteners.
6
mast and cable
Slide the mast into the adapter until it latches. Lead the cable upwards through the lateral hole in the mast and the slot in the adapter and plug in at the terminal until the plug front is flush.
7
insert
Slide the mast with terminal into the wall bracket, guide the cable through the upper hole of the bracket and put the cover on.
8
Align and fix
Connect cables with router and electricity. If the app shows an alignment warning, turn the terminal with the alignment tool and then tighten the thumb screw on the mast.
Masonry, concrete, insulation: the supplied screws are not always enough
The instructions are based on a bearing wooden beam behind the wall – so many houses are built in North America. In Germany, on the other hand, the bracket often sits on wall, concrete or an insulated facade. For bricks and concrete you need dowels or anchors that fit the building material. In the case of a composite thermal insulation system, the load does not belong in the insulation, but with a spacer assembly system in the load-bearing masonry; otherwise, the holder presses the insulation and moisture can penetrate. These instructions are our classification and are not in the Starlink guide. Get advice on insulated facades in the specialist trade.
Roof overhang larger than 10 centimeters?
According to Starlink, the official wall mount is designed for a roof projection of maximum 10.16 cm. Many houses have significantly more overhang at the local walk or at the eaves. Then the terminal hits or looks under the roof edge, and part of the sky is missing. Three way out: mount the bracket on the gable tip, where the projection is smallest, switch to a mast – or use a bracket with an extendable arm. Such arms are currently only available from third-party providers; our assessment of this is in the holding comparison.

- For Standard 4 and 4 X (on Amazon often „Gen 3“) according to the manufacturer – not for Mini
- Telescope support arm creates distance to eaves and roof overhang
- 360° rotatable for orientation by app
- Integrated cable channel for a clean cable routing
- Manganese steel with coating according to manufacturer
Sloping roof, brick and ridge: which roof assembly works
For inclined roofs, Starlink offers the swivel mount. According to the accessories guide, it is intended for sloping roofs with shingles – i.e. for bitumen or similar roofing that can be pierced and sealed. The mounting instructions of the swivel holder describes the sequence as follows:
1
Position above the rafter
Mark the two mounting holes directly above a load-bearing roof rafter.
2
drilling and sealing
Pre-drill with 6 mm, assemble the sealing tape squares and press them into the holes, then glue the sealing tape strip over them.
3
holding screw
Fasten with the tension bolts. The arrow on the holder points upwards to the top of the roof.
4
mast vertical
Align the mast with the spirit level perpendicularly and tighten the lower locking mechanism.
5
Install terminal
Cables are guided through the mast, plugged into the terminal, locked into the mast and pushed into the swivel holder.
6
alignment
After app displayvertisement turn and tighten the thumb screw on the mast, so that nothing more twists.
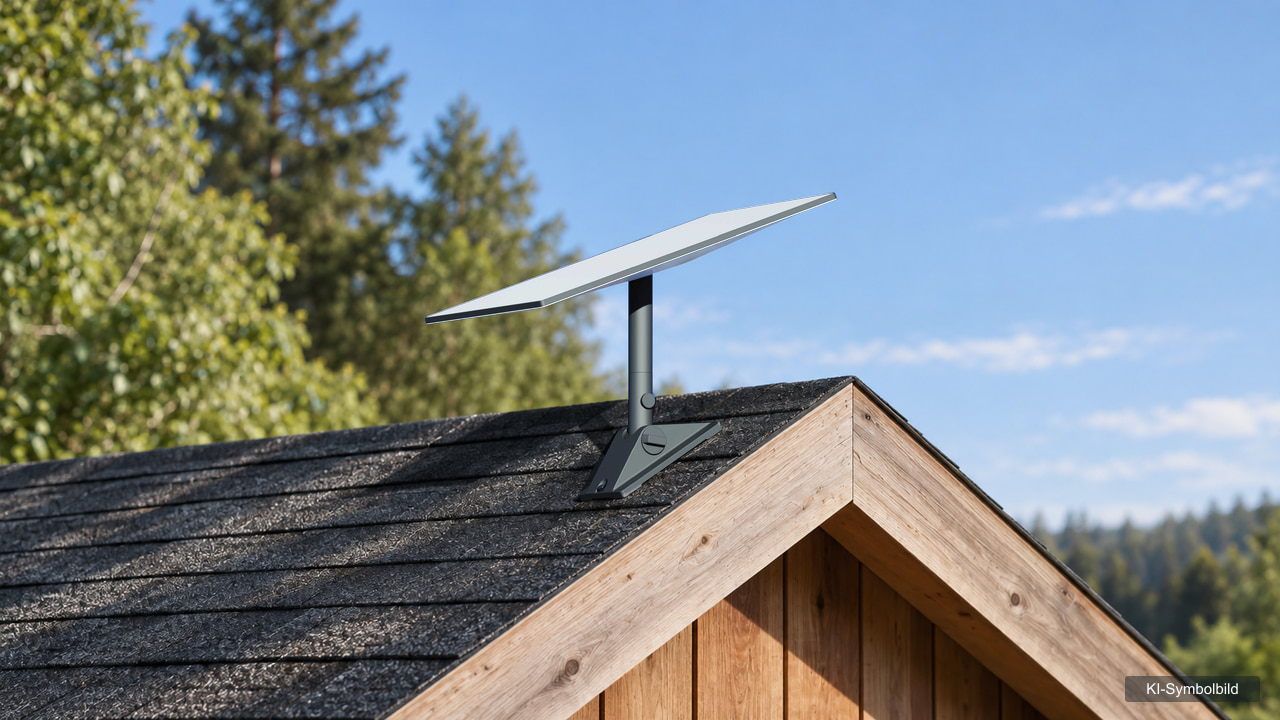
Brick roof: not just screw through the brick
Most roofs in Germany are covered with clay roof tiles or concrete roof tiles. Starlink does not offer its own mount, and the ridge mount is expressly not recommended for clay tiles. The solution that antenna manufacturers have been using for satellite dishes for decades has proven itself: a roof rafter holder, which is screwed under the bricks on the rafter and leads to the outside through a suitable passage or ventilation tile. On top of the pipe you then place the Starlink raw-radapter. This is our classification from the practice of satellite assembly – Starlink also advises in case of doubt to consult a specialist company for roofing and installation.
ridge holder: without drilling on the roof ridge
The First Bracket for Standard and Enterprise sits on the ridge of a saddle roof and is held by four ballast weights – without any bore. Starlink releases them for metal and shingle roofs with a slope of less than 45 degrees, not for clay tiles, and calls a wind resistance of up to 80 km/h. Classification: Storm gusts regularly reach more in exposed locations in this country. Those who live on a hill or on the coast should prefer a screwed solution.
shingle or bitumen roof
Pivot mount with sealing tape – the official solution if a rafter is achievable.
Brick or Dachstein
Roof rafter holder from the satellite trade plus pipe adapter; assembly best by roofer or antenna builder.
Sheet and trapezoidal sheet
ridge mounting possible, but observe wind boundary. Drilling in sheet-metal roofs only with matching sealing disks.
Mast and pipe adapter: the existing satellite mast as Starlink location
Many houses already have an antenna or satellite mast. It is often the best Starlink location because it is high and already securely attached. Starlink pipe adapters pin the terminal directly onto the pipe:
| Adaptation | Appropriate for | Mast diameter | Note: |
|---|---|---|---|
| Standard raw-radapter (Starlink) | Standard 4, 4 X, Enterprise | 31 to 63,5 mm | only metal pipes, not PVC or plastics |
| Mini-raw adapter (in mini-kit) | Starlink Mini | 31 to 50 mm | Also available as a spare part |
| Performance raw-radapter (Starlink) | Performance performance | 38 to 60 mm | Metal tubes only |
| XLTTYWL / SURVADV (Amazon) | Standard 4, 4 X, Enterprise | 31 to 51 mm | Manufacturer specification not released by Starlink |
| MOPHAMP mast holder (Amazon) | Standard 4, 4 X | 25 to 70 mm | With U-bolts, also for railing pipes |
Measure the diameter before purchasing with a caliper. The terminal belongs top on the mast, above an existing satellite dish – the dish looks south, Starlink especially needs the sky in the north. Nevertheless, check with the app whether bowl or mast tip protrude into the field of view.
Do not underestimate leverage: The area of a standard terminal measures 594 × 383 millimeters, i.e. around 0.23 square meters. The further the terminal protrudes beyond the uppermost mast mounting, the more the wind tugs the mast and mounting. Short free mast lengths and fixed clamps are better than a long, thin mast. This is an editorial rule of thumb; the static of a roof mast assesses a specialist company in case of doubt.

- For Standard 4 and Standard 4 X according to manufacturer
- tubes from 25 to 70 mm, vertical or horizontal
- U-bolt clamping without drilling on the mast
- Rohradapter with 20° inclination supplied
- Also usable as an extension for other mounts
Mount Starlink Mini: stand, pipe adapter and flat holder
The Mini is light with 1.1 kilograms and brings the most important holder with it. In our test with the Starlink Mini X we photographed the change from the folding stand to the pipe adapter:
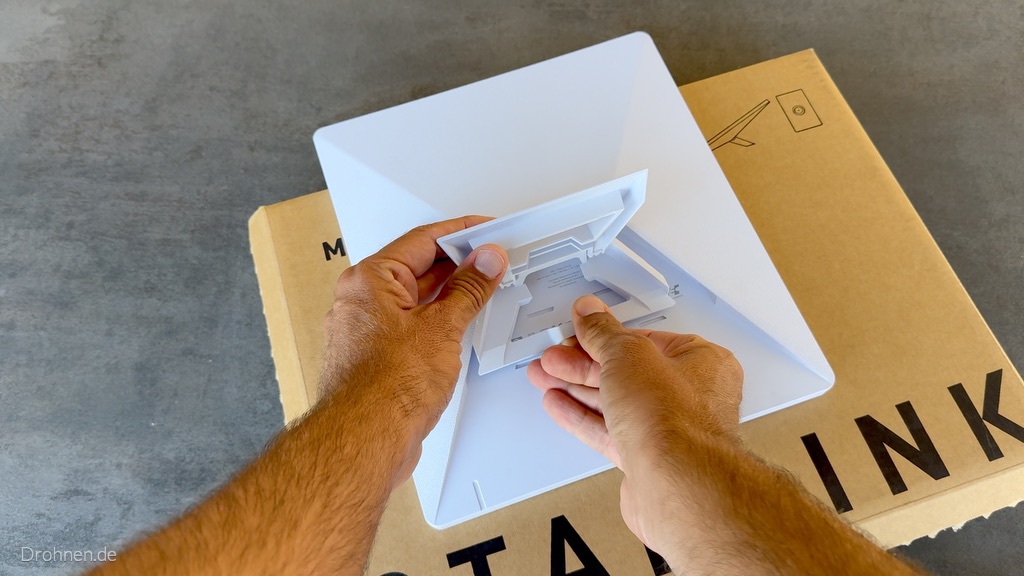
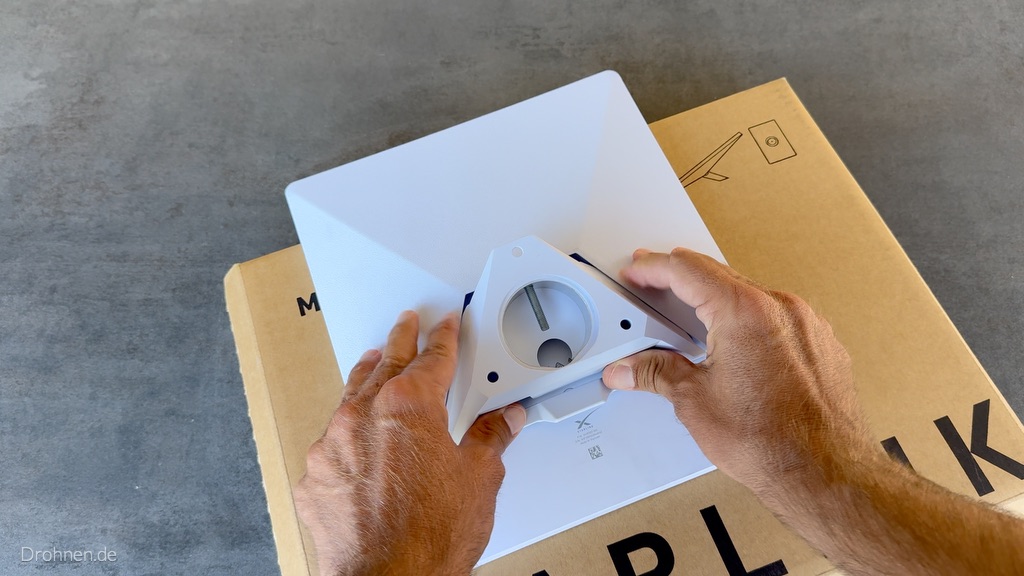
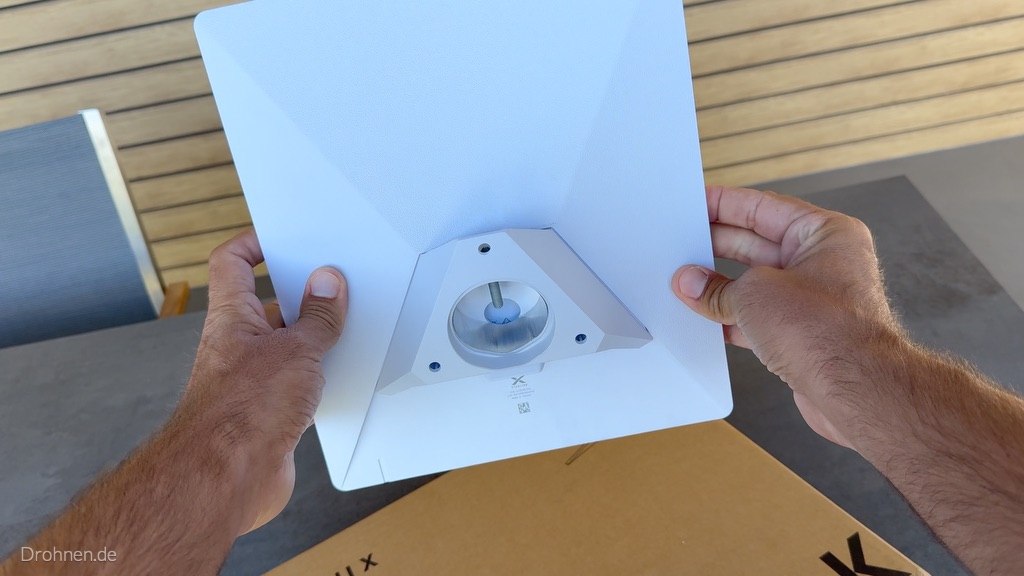
According to the Instructions for mini-raw adapter and flat holder, it goes on like this: take the hexagonal wrench from the underside of the holder, guide the power cable through the opening of the holder, loosen the fastening screw and push the holder onto the tube. After aligning with the app, you tighten the screw handfest.
For the flat mounting on a wall, a board or a post, you mark three holes and drill with 4.5 mm for wood screws or 6.5 mm for bolts. For wood screws, the material should be at least 1.2 centimeters thick, according to Starlink. Screws for flat mounting are not included.
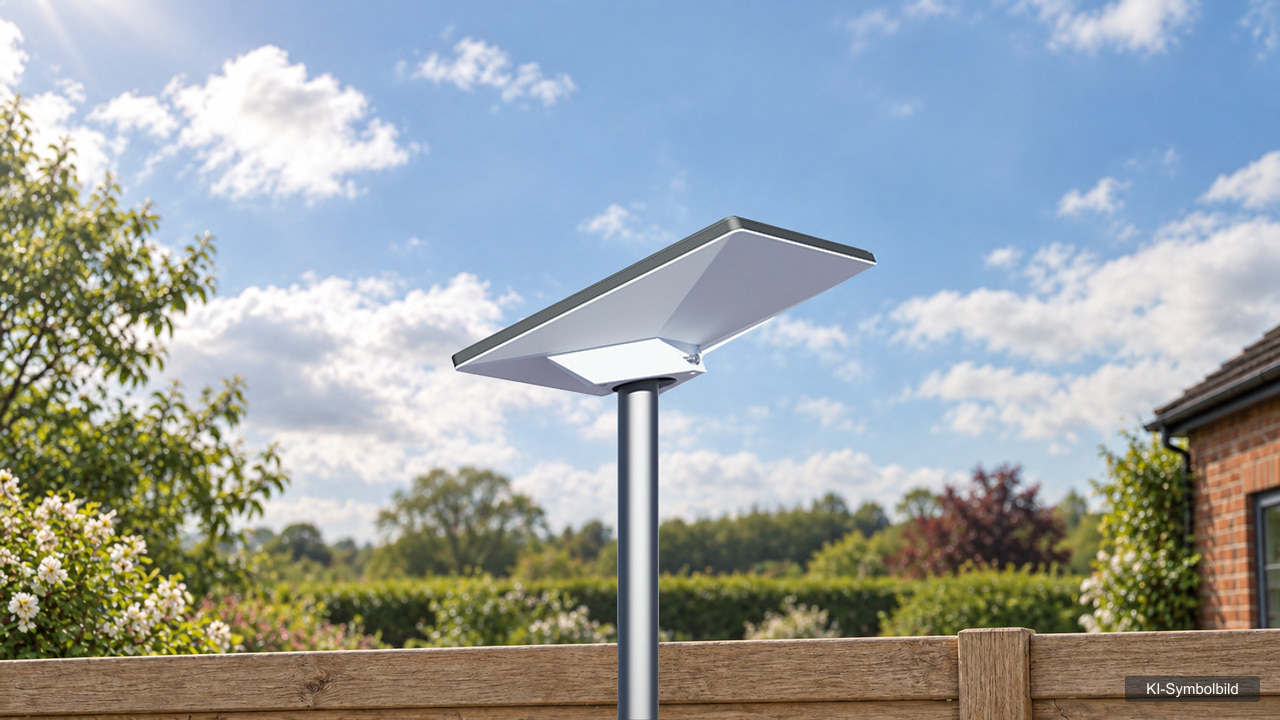
Wall and roof
Mini-wall and mini-pivot mount work like the standard, only smaller. Protrusion on the wall also here at most 10.16 cm.
Vehicle fixed
The mini-mobility mount is screwed and sealed and holds the mini at a 9° angle. The roof rack holder fits on beams from 12 to 48 mm, but not on round pipes.
Magnet and suction cup
Practically standing, but no Starlink release. Magnetic feet only hold on steel, suction cups lose strength in heat and cold.
For ladders, railings and roof racks of motorhomes, there are clamps that accommodate the supplied mini-raw adapter. Magnetic and suction cup mounts are classified in the mount comparison for the mini.

- For the Starlink Mini with the tube adapter of the kit (design 2025 according to the manufacturer)
- Clutch on bars from 15 to 40 mm – Motorhome ladder, roof rack, railing
- 360° rotatable with adjustable inclination
- CNC milled aluminium, anodised
- toolless assembled and removed again
Garden, floor and flat roof: without drilling
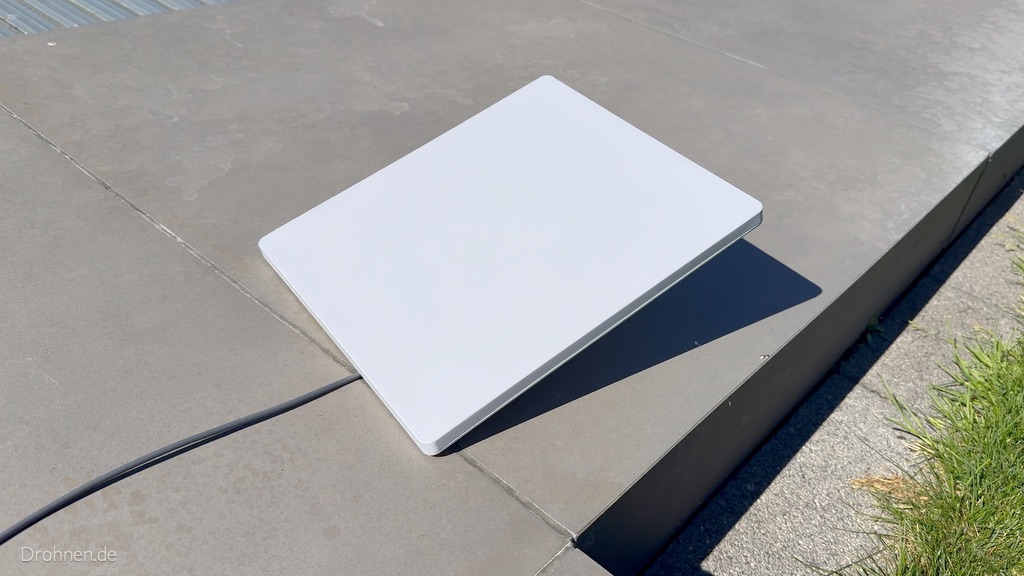
If the garden has clear views to the north, the ground is the easiest location. The stand is sufficient, for the standard there is also the X frame base with mast for a stable floor installation. In our test, the Mini stood on the terrace next to the lawn – with a good result, because nothing obscured the view in the north.
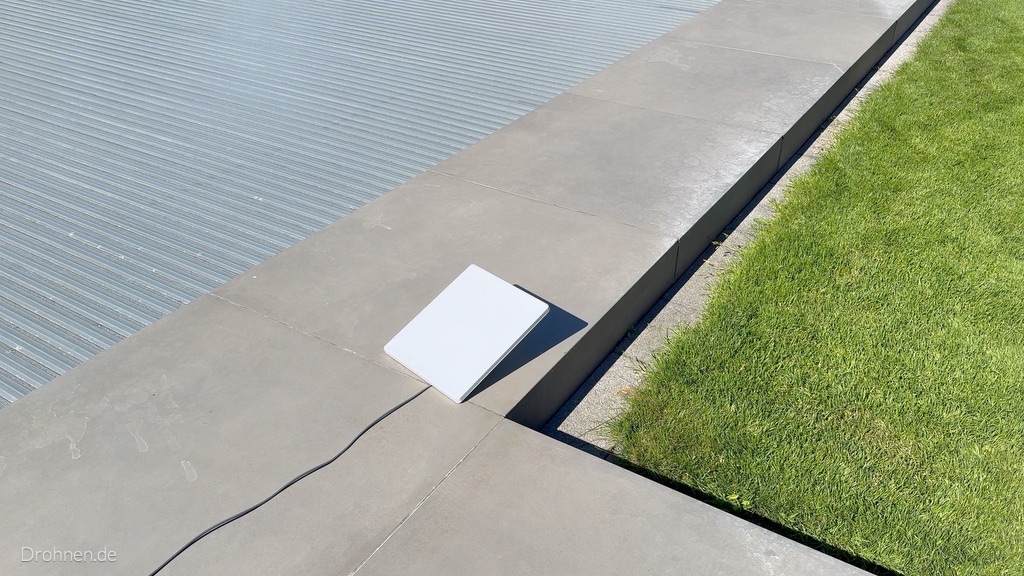
On flat roofs Starlink does not offer its own ballast mount for the standard kit; the ridge mount is intended for saddle roofs. Common are flat roof stands with ballast plates from the satellite trade, on which the pipe adapter is placed. Important: place a protective mat under the stand so that the roof seal is not damaged, and coordinate the load with the house owner or a specialist company. This is our classification, not a manufacturer’s indication.
Snow
According to Starlink Help Center, the terminal can melt snow itself. But choose a place where there is no snowdrift at the terminal.
No protective hoods
Starlink strongly advises against additional covers – they deteriorate performance and snowmelt.
temperature
According to Starlink, the outdoor terminal is designed for −30 to +50 °C, the router and power supply for 0 to +30 °C in the interior.
Cables in the house: plan length, carry out cleanly, do not change anything
Mistakes often occur in cable routing. Starlink is clear here: Although the Starlink cable complies with the RJ45 standard, the manufacturer advises against changing the cable or extending it with another cable. The original cable is waterproof, locked and designed for the power consumption of the kit. Damage caused by external cables can extinguish the warranty according to Starlink Help Center. Longer original cables are available in the Starlink shop.
| Kit | Cables in the Kit | Longer original cables | Note: |
|---|---|---|---|
| Starlink Mini | 15 m DC cable | 30 m DC cable; 5 m USB-C cable for 100 W sources | 15-m Ethernet cable as an accessory for an external router |
| Standard 4 / 4 X | 15 m Starlink cable (PoE) | 45 m Starlink cable | On the 4 X with Router 3 |
| Enterprise | 50 m Starlink cable | – | Separate power supply, 5 m Ethernet cable to router |
| Performance (GEN3) | 25 m cable | 5 m and 50 m | Advanced Power Supply for AC and DC |
| Standard Actuated | 15 m cable | Further lengths in the Starlink shop | Older generation |
Cable planner · Cable lengths according to Starlink
Does the cable extend from the roof to the router?
Measure the cable path in three sections: horizontally outside, the height at the house or mast and the path in the house to the socket at the router. The planner adds a reserve for bows and loops.
Required cable length
18 m
Cables in the Kit
15 m
Assessment
45 m cable
With reserve you need about 18 meters. The cable from the kit is not enough; in the Starlink shop there is a 45-meter original cable. Extensions with external cables are not recommended by Starlink.
Calculation distance: (outside + height + inside) × (1 + reserve), rounded up to whole meters. Cable lengths according to Starlink Help Center and accessory guides, as of 29.09.2026. External cables and extensions are not recommended by Starlink.
Through a wall or a window?
For wall penetration, Starlink offers a Cable Guide Kit and its own set for Wallwork, which you can order in the shop as soon as your kit is ready for shipment. Important: The plug is preassembled, so the bore must be large enough for the plug and is then sealed. According to Starlink , the cable is not designed for laying in the ground or under water and should remain free of kinks – not even clamped in door or window frames.
Flat window bushings from third parties mean additional plug connections in the cable path – this is exactly what Starlink advises against. Our recommendation: Better once clean through the wall or an existing empty pipe, such as that of the old satellite system. Outside, a small drip loop helps before the implementation, so that rainwater drips at the lowest point and does not run into the masonry on the cable. The 20 included clips hold the cable on the wall and gutter.
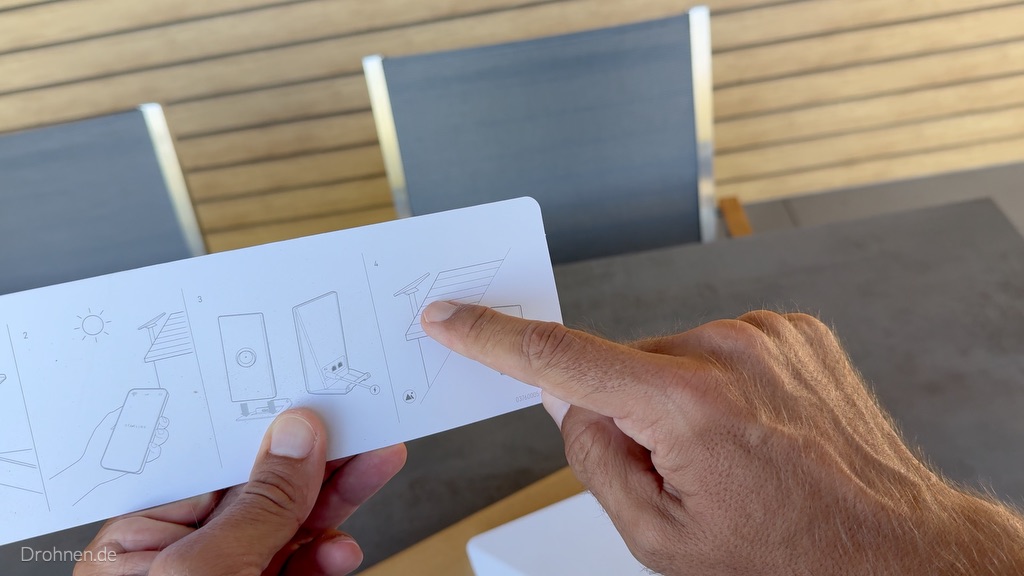
The antenna on the outside, the router on the inside – this is already shown by the quick guide in the carton. Router and power supply are not intended for outdoor use; Starlink calls for them an operating range of 0 to 30 degrees Celsius indoors.
Therefore, plan the cable path so that the router is at a central point in the house. This improves Wi-Fi coverage throughout the house.

- For router 3 (Gen 3) from the standard 4-X kit according to the manufacturer
- Router and power supply in one holder
- ABS plastic, simple design for interiors
- Quick assembly with screws and dowels
- Alternative: the official router 3 holder of Starlink
Balcony, rental apartment, community of owners: what to clarify before installation
Technically, the balcony is often a usable location – provided it is located on the north, east or west side and the house itself does not hide the northern sky. Legally, it is the most delicate option. The following points are a general classification and not legal advice.
Tenant
Drilling in facade, railing or balcony plate engages in foreign property. For this you need the consent of the landlord – preferably in writing and before the purchase.
Owners in the WEG
Exterior wall and railings usually belong to the community property. According to § 20 WEG, structural changes require a decision by the community.
Without drilling
A weighted stand or a clamp on the railing tube can be removed without residue. This is usually unproblematic, but does not replace a look in the rental contract and house rules.
A special feature: § 20 paragraph 2 of the Housing Ownership Act gives each owner a right to appropriate structural changes that serve the „connection to a telecommunications network with very high capacity“ (legal text). Whether a Starlink antenna falls under this is not clarified by court to our knowledge – the term is primarily aimed at fiber optics. If they fell under it, the community decided only about the how, not the if.
Crash protection
A terminal that falls off the balcony endangers people underneath. Clamps double secure, additionally attach a safety rope and hang nothing over the parapet to the outside.
South balcony
On the south side, the own house hides the important northern sky. Before buying, it is essential to scan with the app – often the view is not enough.
Short in view
If the terminal stands on the balcony floor, the parapet hides the deep sky. A clamp on the upper railing brings it over the edge.
More about the cardinal direction and the southern balcony can be found in the guide Align Starlink. For arbor and plot again their own rules apply – see Starlink in the allotment garden.
🏆 Amazon Bestseller
The following overview shows the best-selling Starlink balcony and railing brackets on Amazon and is automatically updated with current prices, availability and reviews.
- Designed for the Starlink Standard Satellite Dish – Features a Starlink raw radar adapter that is perfectly compatible with the standard satellite dish. The angle of inclination of 20° is designed for optimal satellite reception, while the thickened material ensures a strong and stable holder.
- Flexible mounting options – Compatible with vertical and horizontal bars with diameters from 25 mm to 70 mm and offers versatile installation options for different scenarios.
- Ideal for a wide range of applications – Perfect for installation on existing masts, RVs, balconies, etc. and offers a stable base wherever you need connectivity.
- For temporary or permanent use – Works perfectly for short-term superstructures such as motorhomes or camping as well as for long-term permanent installations on balconies, in backyards or on existing masts.
- Works as a bracket extension – Can also be used as an extension for other brackets, providing extra length and flexibility if you need extra free space or a higher installation point.

- Maximum compatibility (2026 update): Specially designed for the latest Starlink Standard 4 (Gen4), Standard 4X and Enterprise Dish. Thanks to the supplied precision pipe adapter, the Starlink Gen 4 pole assembly set fits universally on ladders, rails and masts with a diameter of 20 to 50 mm.
- RV-Optimized Design: The ideal solution for RV and camping. Attach your Starlink antenna securely to the rear ladder or roof rack. The compact, portable design allows for quick setup and disassembly during your journey.
- Premium corrosion protection: Thanks to an advanced electrophoresis process, the aluminium alloy is not only stainless, but also extremely resistant to UV radiation and salt water. Perfect for use in harsh conditions on the sea or in the mountains.
- Double fuse & stability: Our precision-manufactured aluminum clamps offer a dual protection system against slipping. With a tested load capacity of up to 90 kg (200 lbs), your connection remains stable even in strong gusts of storms while driving (at standstill).
- Bottom feed cable routing: An intelligent design enables protected cable laying through the interior of the bracket. This prevents cable lettuce and protects the sensitive connections of your Starlink Gen3 kit from mechanical stress. If you have any problems with your Starlink Gen 3 kit, you can always contact us via Amazon Messages.

- 1. 360° Free Adjustment – Perfect Alignment for Starlink Gen3 The 360° adjustable Starlink Gen 3 bracket allows for flexible and accurate alignment of your Starlink Gen3 or Starlink Standard Kit. Whether you install it as a Starlink Gen 3 wall mount or Starlink roof mount in the garden or outdoor area, optimized satellite reception is guaranteed.
- 2. High-strength Manganese Steel – Rustfest & Extremely Robust Made of high-quality manganese steel, this Starlink Gen 3 holder has a thick protective layer that effectively prevents rust and corrosion even when used outdoors for many years. The robust design withstands weather conditions and ensures long-lasting reliability for your Starlink system.
- 3. Multi-sided mounting – Wall & roof for outdoor scenarios As a universal Starlink mount, this holder can be used flexibly: both as a Starlink wall holder Gen 3 for walls and as a Starlink roof holder for roofs. Perfect for garden, terrace or other outdoor areas – adapts seamlessly to different installation environments.
- 4. Easy installation – Suitable for Starlink Gen3/Standard Kit The complete assembly set of the Starlink Gen3 bracket allows for quick installation without complex tools. It is specially adapted to the Starlink Standard Kit and Starlink Gen3 – the ideal Starlink Gen 3 holder for uncomplicated setup and immediate use.
- 5. Premium quality from 3BAO – Trustworthy accessories 3BAO stands for high-quality technical accessories: this Starlink Gen 3 holder undergoes strict quality controls to ensure adjustability, rust resistance and robustness. A reliable companion for your Starlink system – practical and durable.
- Designed for Starlink Mini – Includes an adapter holder that is compatible with the mini rod adapter. The adapter is secured by means of screws and nuts and offers a much more stable and reliable attachment than the simple plug-in system.
- No drilling, simple installation with U-Bolt clamps – Designed for a fast and uncomplicated construction, this holder is securely attached to existing masts without the need for elaborate tools.
- Flexible mounting options – Compatible with vertical and horizontal masts ranging from 20 mm to 70 mm in diameter, allowing for versatile installation for various applications.
- For temporary or permanent use – ideal for short-term superstructures such as in motorhomes or camping, as well as for permanent installations on balconies, in the garden or on existing masts.
- Complete assembly kit included – Delivers adapter mount, mast mount mount, screws and nuts, U-bolts and clamps. So you get everything for a safe and reliable installation directly ex works.
Lightning protection, earthing and storm: what Starlink says and what applies here
Starlink writes in the Help Center that the terminal meets the grounding requirements of the US National Electrical Code. In thunderstorm-prone regions, an external lightning protection system – lightning rod, earthing rod, surge protection – could reduce vulnerability. In the event of thunderstorms or prolonged absence, the manufacturer recommends unplugging the power plug and disconnecting the Starlink cable from the device.
In Germany, DIN EN 60728-11 (VDE 0855-1) governs earthing and equipotential bonding for antenna systems. For rooftop antenna masts, it specifies earthing with at least 16 mm² copper and equipotential bonding, as lightning-protection manufacturer DEHN summarises in its practical guidance. A qualified electrician should assess whether and how these requirements apply to your Starlink installation, for example a rooftop mast or a building with a lightning-protection system. Incorrect connections can conduct lightning currents into the building.
Under the roof edge
Wall mounts below the roof edge and close to the facade are often considered less critical in satellite systems than masts above the ridge. The grading shall be carried out by the specialised organisation.
Mast above the First
Exposed masts on the roof are the classic case for grounding and potential equalization according to VDE 0855-1.
Wind
Starlink mentions 80 km/h for the ridge mount, 280 km/h for the performance mounts. Wind values from datasheets apply to the combination tested, not to every craft solution.
Do I need a permit for Starlink?
For a wall mount or a short mast usually not. Building code law is a matter for the state; according to the model building code, which many states have adopted, antenna systems including masts up to 10 meters in height are process-free (Information Center Mobile Communication). Process-free does not mean, however, that no rules apply: monument protection, design statutes of the municipality or a development plan can restrict antennas on the facade. In the case of a monument or in a protected village, ask the municipality beforehand. This classification does not replace information from the building office.
Assembly by the professional: what Starlink offers and what it costs
Starlink works in selected markets with trained installation partners; for Germany, the Help Center refers to the support for questions about the installation. According to Starlink, a standard professional assembly usually includes:
Contained
Location assessment on site, assembly with the standard home support, cable to the nearest house entrance, router connection, activation, performance test and app briefing. Duration: usually around 90 minutes.
Not included
Installers do not carry out mast mounts. Also uninstallation and additional accessories are not included.
Additional costs
Long journeys, certain types of houses or special requests such as longer cables, trenches or special installation can cost extra.
Starlink will only refund installations purchased directly through the Starlink website and will not accept any liability for any third-party work. Independent assembly companies offer Starlink installations at a fixed price – a provider from Hamburg, for example, calls 599 euros including VAT for a standard assembly within a radius of 70 kilometres (starlink-montage.de). This is a regional example, not a recommendation. For roof and mast installations, antenna builders, electrical and roofing companies that install satellite systems are also possible.
Even mounting saves the money for the installer – the holder usually costs less than 100 euros. Who still has to order Starlink, gets credited via the recommendation link as a new customer according to Starlink a service month.
Typical errors in Starlink assembly
Bought bracket before scan
First let the app check, then buy. Otherwise, the new holder sits exactly where the tree disturbs in the north.
False Kit
Mini, standard and performance brackets are not compatible with each other. “Gen 3” on Amazon usually means the standard rectangular terminal.
Plastic pipe as mast
Starlink pipe adapters are only released for metal pipes, not PVC or plastic.
Wood screws in insulation
The supplied tension screws need a supporting substrate. In masonry, concrete and insulated facades choose suitable fastener material.
Cable extended or kinked
No external cables, no couplings, no squeezing in the window frame. Kinks and moisture are among the typical cable damage.
Forget thumb screw
After alignment, tighten the screw on the mast. Otherwise, the wind turns the terminal, and the app again reports a misalignment.
Protective hood mounted
Starlink advises against covers. They deteriorate reception and snowmelt.
Brought through bricks
Drilling in clay bricks can hardly be permanently sealed. On tile roofs, use a rafter holder with through-brick.
Checklist: securely mount Starlink
Hook the points off. Your progress is only stored in your browser.
0 out of 11 points completed
Frequent questions about Starlink mounting
Do I need a bracket for Starlink?
Not mandatory. Standard and mini kit contain a stand, which according to Starlink can also be used permanently; the mini also includes a pipe adapter for masts with 31 to 50 mm. A bracket is worthwhile if obstacles cover the sky on the ground.
How much does it cost to assemble Starlink?
You only pay for the bracket yourself: Original wall brackets cost in September 2026 from around 39 euros for the Mini and from around 85 euros for the standard, alternatives on Amazon often less. Assembly companies offer fixed prices, a Hamburg-based provider about 599 euros for a standard assembly.
How do I fix Starlink to the house?
The easiest with the official wall mount on the gable or facade tip: drill holes over a load-bearing substrate, seal with silicone, screw mount, insert terminal with mast and align according to app.
Where should I put Starlink?
Where the obstacle test of the app reports clear view – in Germany especially to the northern sky. Elevated locations such as gable, roof or mast are often best, according to Starlink.
Can I install Starlink myself?
Yes. According to Starlink, all mounts are designed for easy self-assembly; in case of uncertainty, the manufacturer advises a specialist company for roofing and installation. On tile roofs we recommend this anyway.
Do mini-mounts also fit on the standard Starlink?
No. Starlink mounts are kit-specific. Standard 4, Standard 4 X and Enterprise share the accessories, the Mini and the performance kits have their own mounts.
Can I use my old satellite mast for Starlink?
Yes, if it is made of metal and the diameter fits: 31 to 63.5 mm for the standard raw-radapter, 31 to 50 mm for the mini adapter. The terminal belongs on top of the mast, above the satellite dish.
How high does Starlink need to be mounted?
There is no minimum height. Crucially, obstacles do not protrude into the field of view. The obstacle calculator in our alignment guide shows how much higher the antenna should be.
Can I mount Starlink on a brick roof?
Yes, but not with the ridge mount, which Starlink does not recommend for clay tiles. Usual is a roof rafter holder from the satellite trade with through-brick on which the pipe adapter is placed.
Does Starlink need to be grounded?
Starlink cites the fulfillment of the US earthing requirements and advises on external lightning protection in thunderstormous regions. In Germany, DIN EN 60728-11 (VDE 0855-1) regulates the grounding of antenna systems; an electrician should test for masts on the roof.
Do I need a building permit for a Starlink mast?
Usually not. According to the model building code, antenna systems with masts up to 10 m are process-free; the state building codes deviate in part. Monument protection and design statutes can still set limits.
Can I mount Starlink as a tenant on the balcony?
For drilling on facade or railings you need the consent of the landlord. A complained stand or a clamp without drilling is usually unproblematic; rental contract and house rules should still be checked.
Can I shorten or extend the Starlink cable?
Starlink advises against altering the cable or extending it with external cables; damages can extinguish the warranty. Longer original cables are available in the Starlink shop, at the standard up to 45 m, at the Mini up to 30 m.
How do I get the Starlink cable into the house?
The cleanest through a sealed wall bore or an existing empty pipe. Starlink offers a cable kit and a set for masonry. The cable shall not be kinked or squeezed in the window frame.
Which mount is suitable for a flat roof?
Starlink does not have its own flat roof ballast holder for the standard kit. Usually flat roof stands with ballast from the satellite trade plus pipe adapters, with protective mat under the stand.
Conclusion: First check the sky, then choose the holder
Many Starlink users are satisfied with stands or wall mount. What matters is not the most expensive bracket, but the right place: clear view to the north, solid ground, a short and clean cable path. The official brackets are fitting and well documented, but kit-specific and not always ideal for German tile roofs and wide roof projections – roof rafter holders, masts or brackets with a longer arm help there.
In addition, plan the surroundings: extend cables only in the original, clarify permits as tenants or owners beforehand and coordinate earthing and lightning protection with a specialist in the case of masts on the roof. Then the antenna sits permanently safe – and provides the connection you pay for.
Read more: all Starlink guides on Drohnen.de
From the first question “Is it worth it?” to the finished assembly: Here you will find all Starlink guides from Drohnen.de sorted by topic.
Basics and experience
Own hands-on test with the Mini X: furnishings, speed tests and everyday life.
Speed, latency, cost and safety in direct comparison.
All providers, GEO or LEO, cost calculator and technology finder.
Costs and tariffs
All tariffs, one-time fees, rental and termination in detail.
Travel fares, use in movement and electricity in the camper.
Hardware and assembly
Mini, standard and performance with moderation and consumption.
Principal direction, obstacles and the turning aid of the app.
Original or Amazon: Brackets for Mini and Standard.
Special locations of use
Right, electricity without connection, tariffs and winter break for the arbor.
Internet for long-distance drivers: tariffs, installation and electricity in the cab.
Availability and countries
World map with country check and direct link to the Starlink map.
Experience, costs in euros, rental law and cube comparison.
Prices in francs, basic services, Alp and mountain hut.
- Starlink in the test 2026: Speed, latency & experience
- SpaceX IPO time: When does the trade start?
- Starlink Prices October 2026: Fees, discount & 1 month free
- Starlink Hardware 2026: V5, Mini & Standard in comparison
- Starlink Availability worldwide: Map & Countries 2026 check here
- Orient Starlink correctly: cardinal direction, angle & app [instructions]
- Starlink for Motorhome 2026: Travel fares, electricity & hotspot
- Starlink vs. Glass & DSL 2026: Comparison + Safety
- Internet via satellite 2026: provider, costs & comparison
- Powerstation for home office: runtime, size & models 2026
Source, method and liability statement
Information on brackets, limit values, scope of delivery, cable lengths, assembly steps, weather and professional assembly comes from the accessory guides and assembly instructions of Starlink as well as from the German Starlink Help Center, retrieved on 29.09.2026. Prices come from price comparisons and merchant sites on the same date and may change daily. We have selected the Amazon products presented according to the manufacturer’s specifications and have not tested them ourselves; they are not approved by Starlink. Photos with the note “Drohnen.de” come from our own test with a Starlink Mini X in September 2026. Information on fortification, statics, lightning protection, rental, homeownership and building law is general information and does not replace legal advice or the examination by a specialist company in individual cases.
Transparency and editorial note: The German original refers to the transparency requirements under Article 50 of the EU AI Act applying from 2 August 2026. Articles are reviewed, put into editorial context and approved before publication. Final assessment and editorial responsibility remain with the editorial team.
For the visual design, we use not only our own and provided shots but also symbol images and illustrations. These can be created or adapted as part of the creation or editing using digital tools. Insofar as there are statutory transparency or labelling obligations for individual contents, these are indicated accordingly.
Individual product boxes and product links in this post are partner links. If you buy through it, our editorial team receives a small commission – the price remains unchanged for you. This has no influence on test results, grades and recommendations.
Sources
Show all sources used
Manufacturer sources – Starlink / SpaceX:
- Help Center: Do I need a bracket?
- Help Center: Where should I mount my Starlink?
- Help Center: How much cable do I have and how do I install it in the house?
- Help center: snow, rain, storm, thunderstorm and temperatures
- Help Center: Does Starlink provide fitters?
- Standard accessories guide (PDF)
- Min mini accessories guide (PDF)
- Enterprise accessories guide (PDF)
- Accessory Guide Performance (PDF, English)
- Instructions for mounting standard wall mount (PDF)
- Swivel mounting instructions (PDF)
- Instructions for mounting mini-raw adapter and flat holder (PDF)
- Modification instructions Standard Starlink (PDF)
Law and norms:
- Law on Housing Property, § 20 Construction Changes
- Mobile information centre: Building rights for antenna installations
- DEHN: potential equalization and grounding of the antenna system (PDF)
Market and Price Sources:
- idealo: Price comparison Starlink brackets
- Hornbach: Starlink Standard Wall Mount
- starlink-montage.de: Festpreis-Montage Hamburg
Photos with the note “Drohnen.de”: own hands-on test with the Starlink Mini X, September 2026.